The moving average (MA) indicator smooths price into a trend line. Traders use moving averages to identify direction, filter entries, and manage exits. This guide explains SMA vs EMA, popular MA settings, and practical strategies with clear rules.
Moving averages explained
A moving average turns raw price into a smoother line. Instead of reacting to every candle, you see the bigger direction. This makes moving averages useful for:
- Trend direction (bullish vs bearish bias)
- Trend strength (angle and separation)
- Filtering trades (avoid counter-trend entries)
- Dynamic support/resistance zones
- Basic trade management (trail stops or exits)
SMA vs EMA
- SMA: smoother, slower reaction — better for clean long-term filtering.
- EMA: faster reaction — better for entries, pullbacks, and short/medium trends.
Many traders use EMA for execution and SMA for context. Example: 20 EMA for pullbacks, 200 SMA as the long-term trend filter.
Popular MA settings (20/50/200)
Short trend & pullback guide. Often used as a dynamic zone in strong trends.
Medium trend filter. Useful to confirm direction and manage trades.
Long-term bias. Many traders avoid buys below 200 and sells above 200.
There isn’t one “best” moving average. A practical combo is: 20 EMA for pullbacks, 50 MA for trend stability, and 200 MA for long-term bias. The best MA is the one that fits your timeframe and gives you rules you can apply consistently.
How traders use MAs
Moving averages become most useful when used as a simple decision framework:
- Trend filter: Only take buys when price is above 200 MA (and it’s sloping up).
- Pullback entries: Enter after price pulls back into the 20 EMA zone and shows rejection.
- Dynamic support/resistance: Treat 20/50 MA as a zone where price can react in trends.
- Exits: Exit when price closes strongly on the wrong side of the MA or breaks structure.
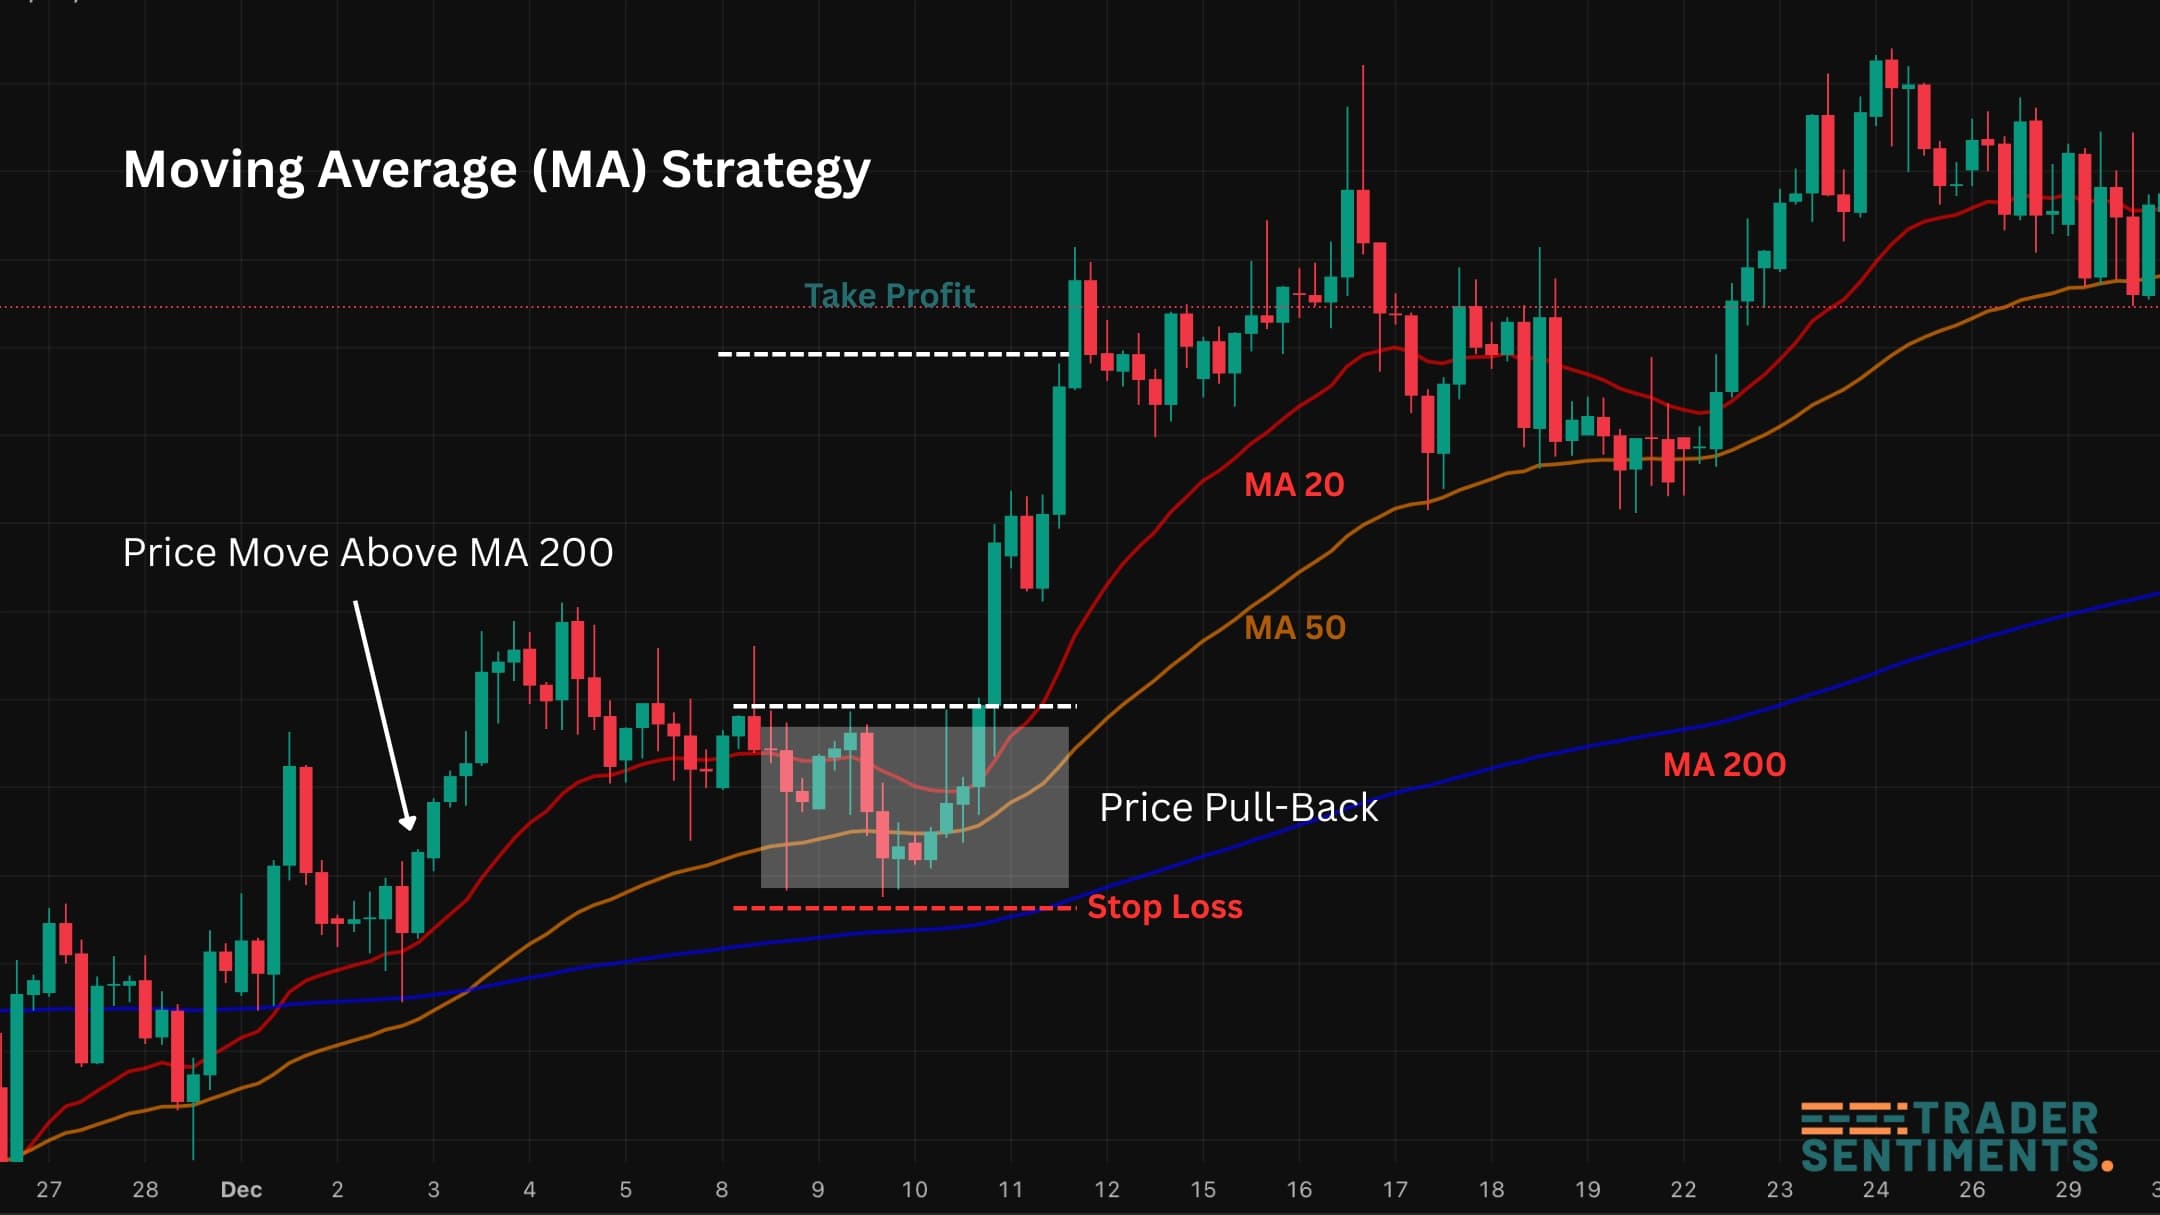
Example chart showing trend filter + pullback to MA.
MA strategies (rules-based)
- Trend: Price above 200 MA and 200 slopes up
- Setup: Pullback into 20 EMA zone
- Trigger: Strong bullish candle / rejection
- Stop: Below pullback swing
- Target: Previous high or next resistance
- Buy: Fast MA crosses above slow MA
- Sell: Fast MA crosses below slow MA
- Filter: Avoid low-volatility ranges (whipsaws)
- Risk: Fixed % risk and limit repeated signals
In a trend trade, trail your stop behind the 20 EMA or exit after a strong close on the wrong side of the MA. This keeps you in long moves and exits when the trend breaks.
Common mistakes & filters
- Chasing late: entering far away from the MA after a big run.
- Ignoring structure: MA alone is not support/resistance — confirm with levels.
- Whipsaw markets: ranging conditions produce repeated false signals.
- No risk rules: MAs don’t protect you from over-leverage — position sizing does.
Helpful filters: higher-timeframe trend alignment, key support/resistance zones, session timing, ATR-based volatility checks, and avoiding major news spikes.